
WAVE Micro:
- You need: 1 Wave Micro, 1 48V POE injector (and POE power) that goes specifically with Micro, ethernet, router/computer
1. Plug in the power to the POE and plug in one ethernet from the computer to the LAN port. In the POE OUT port, put another ethernet from it to the Micro.
2. Make sure your IP address in the network settings for IPV4 is set to 192.168.1.xx.
3. Then click on the 192.168.1.20 Ants tab on the bookmarks, just like when configuring an AC.
4. When it comes up as Wave AP Micro, click the same things as you with an AC, and then if you have a configuration file, use it. If not, then hit continue without uploading a config file.
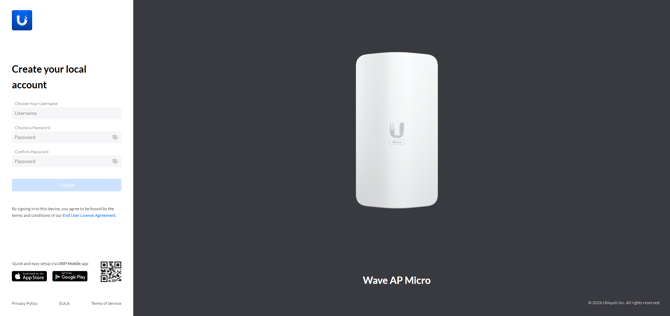
If you do have a configuration file, skip this step. If you do not have a configuration file, after pressing continue, you should see this page.
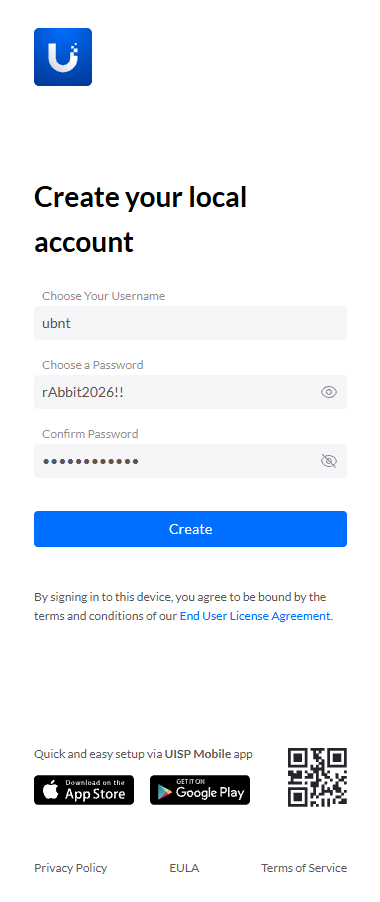
5. Set the username as "ubnt", and the password as "rAbbit2026!!". These are case-sensitive.
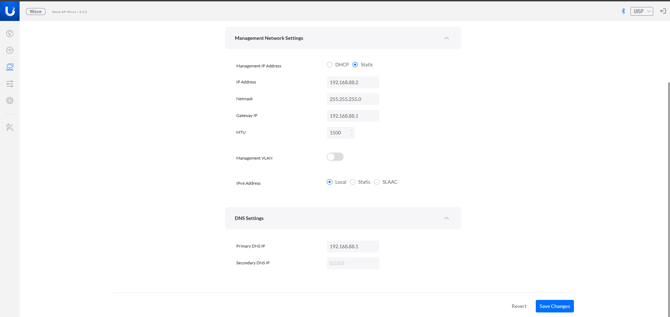
6. After logging in, then make sure all of these settings are changed according to the next following pictures:
On the Network tab on the left side everything should be changed to this: (Do NOT press save changes after doing this yet):
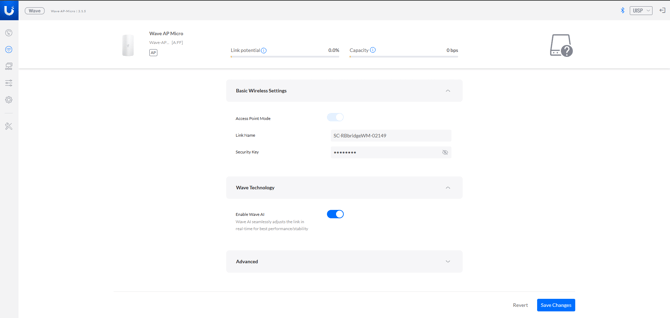
Then on the wireless tab:
Also make sure the toggle for "Enable Wave AI" is turned OFF. It is on by default, as in the picture, but make sure it is turned off.
(Still do NOT press save changes after doing this yet):
Finally, on the system tab, make sure everything looks this way: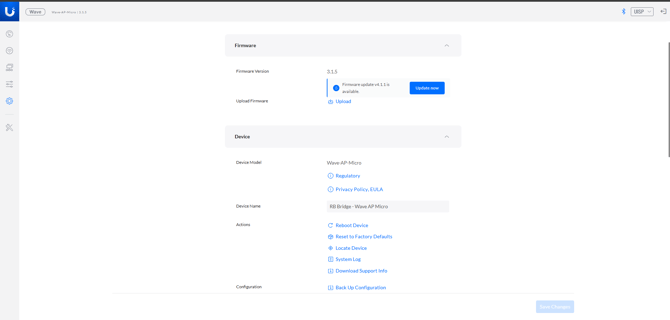
If you have any questions about any of these, ask Renee. After ALL of these changes have been made the way they are supposed to be, then you can click save changes at the bottom, and wait for it to configure.
WAVE Pico:
This is the same as configuring the wave Micro except you do not need a 48V POE that specifically goes with a Micro. You can use the big 48V POE that is also used with U7 rectangle antennas.
The username and password will still be "ubnt" and "rAbbit2026!!", and most of the information will stay the same, other than that the pico is not an the bridge, but the station (just like with AC's). So if you don't know what to put for the name, ask about it.
Once everything is set, click save changes and wait for the Micro and the Pico to show lock lights and connect with each other. Once they do and you see the message on the computer that says "lost connection to the device", then you are good. You can close the tabs you used to configure them and unplug and sticker them, which is shown in this article: https://help.myskycoach.com/acm